KVS Service
Purpose
Define a key-value store (KVS) service. The KVS service provides a lightweight, persistent key-value store shared across the layline.io Reactive Engine Cluster. It is useful for caching, session state, or any scenario where fast local storage is needed.
Data is automatically persisted to disk via snapshots and can be passivated (evicted from memory) after a configurable interval.
The KVS service stores data in-memory by default and persists it across the entire Reactive Engine Cluster. Data is shared per dataset across all cluster nodes — regardless of which engine node stored it.
Configuration
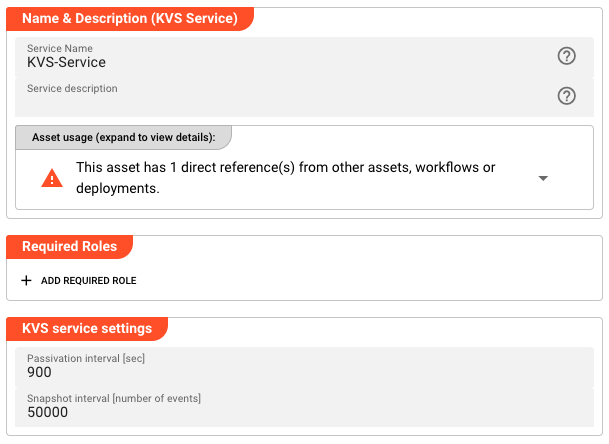
Name & Description
-
Name: Name of the Asset. Spaces are not allowed in the name. -
Description: Enter a description.
The Asset Usage box shows how many times this Asset is used and which parts are referencing it.
Click to expand and then click to follow, if any.
Required Roles
In case you are deploying to a Cluster which is running (a) Reactive Engine Nodes which have (b) specific Roles
configured, then you can restrict use of this Asset to those Nodes with matching roles.
If you want this restriction, then enter the names of the Required Roles here. Otherwise, leave empty to match all
Nodes (no restriction).
KVS Service Settings
-
Passivation interval [sec]: Time in seconds after which inactive entries are passivated (evicted from memory). Default:900(15 minutes). Set to0to disable passivation. -
Snapshot interval [number of events]: Number of events after which a snapshot of the KVS state is written to disk. Default:50000. Snapshots enable the KVS to recover state after a restart.
Service Functions
The KVS service provides the following built-in functions:
| Function | Description | Parameters |
|---|---|---|
Write | Write a value to the key-value store | Set — The name of the key-value set (analogous to a table)Key — The key identifierValue — The value to storeGeneration — Optional generation counter for optimistic locking |
Read | Read a value from the key-value store | Set — The name of the key-value setKey — The key identifier |
Delete | Delete a value from the key-value store | Set — The name of the key-value setKey — The key identifierGeneration — Optional generation counter for conditional deletion |
DeleteSet | Delete an entire set from the store | Set — The name of the key-value set to delete entirely |
Response — All functions (except DeleteSet) return a response object with the following fields:
| Field | Description |
|---|---|
Value | The stored value (returned by Read and Write) |
Generation | The generation counter of the stored entry |
Using the KVS Service from a Script Processor
Example: Reading and writing values: import TabItem from '@theme/TabItem';
- JavaScript
- Python
/**
 * Read customer data from the KVS store
 * @param customerId Customer ID (the KVS key)
 * @return Customer data if found
 */
function readCustomerData(customerId) {
    let result = services.MyKvsService.Read({
        Set: "CustomerData",
        Key: customerId,
    });

    if (result && result.data) {
        return result.data.Value;
    }

    return null;
}

/**
 * Write customer data to the KVS store
 * @param customerId Customer ID (the KVS key)
 * @param customerData Customer data to store
 */
function writeCustomerData(customerId, customerData) {
    services.MyKvsService.Write({
        Set: "CustomerData",
        Key: customerId,
        Value: customerData,
    });
}
import json

def read_customer_data(customer_id):
    """Read customer data from the KVS store.
    @param customer_id: Customer ID (the KVS key)
    @return: Customer data if found
    """
    result = services.MyKvsService.Read({
        'Set': 'CustomerData',
        'Key': customer_id,
    })

    if result and result.data:
        return result.data.Value

    return None


def write_customer_data(customer_id, customer_data):
    """Write customer data to the KVS store.
    @param customer_id: Customer ID (the KVS key)
    @param customer_data: Customer data to store
    """
    services.MyKvsService.Write({
        'Set': 'CustomerData',
        'Key': customer_id,
        'Value': customer_data,
    })
For more information, see JavaScript Processor or Python Processor.
Service Testing
layline.io provides a test facility for testing your Services before you deploy them. In this way, you save time and effort by testing your Services without having to deploy and activate a whole Project with Workflows.
Once you have configured your Service(s), you can test them:
Within your Asset Configuration tab (1), switch to the Test tab (2) to test your Service.

Test Facility Toolbar
The toolbar provides the following options:

The Testing tab provides two major views:
- Testcase configuration: This is where you define the testcases to be executed.
- Testcase execution: This is where you can execute the testcases and see the results.
You switch between these two views by clicking on the leftmost icon in the toolbar (1).
Let's start with the Testcase configuration view.
Testcase Configuration
The concept of the Testing is to define a set of Testcases which can be executed in a batch or individually. For this purpose, you can define multiple Testcases and configure them individually. I.e. each Testcase groups a number of indidivual tests which can be executed individually or in a batch.
Adding a Testcase
Click Add Testcase in the toolbar to add a new testcase:

A new Testcase is added.
It is automatically named New<Service Asset Name>Test (3) and added to the list of Testcases (2).
Service test name(3): You can change the name of the Testcase here.Service test description(4): You can add a description to the Testcase here.
Test Case Setup
Basics
In this section you define the individual tests to be executed for this Testcase.
To start, click # END in the toolbar:

A new test is added to the list of tests (1), and the test is opened for configuration (2).

Next we fill in the details:
-
Test name(3): You can change the name of the Test here. -
Test description(4): You can add a description to the Test here. -
Service function to test(5): Select the Service function to test here.This list contains all Service functions which are defined in the Service Asset. Pick the one you want to test.

Once a Service function is selected, the system will automatically create a skeleton to fill in the respective parameters for the selected Service function.

Service Function Input Parameters
-
Service Function Input Parameters(6): Fill in the respective parameters for the selected Service function.In our example we have a function
GetAlertsForSitewhich takes two parametersbaseurlandriskId. If we click onAdd memberin the skeleton table the system will allow you to select the respective parameter from the list of available parameters:
Once you have selected the parameter, the system will automatically add the respective parameter name. You then add the respective value for the parameter:

Service Function Evaluation Parameters
To automatically evaluate the result, you can add a script which analyzes the results.
Testcase Execution
Once you have configured your Testcases, you can execute them.
There are two ways on how to trigger execution:
-
Option 1: Select
Run selected testin the toolbar (1) to execute the currently selected Testcase.
Executing a test this way will switch the tab to the Testcase execution view, execute the test and show the results.
-
Option 2: Switch to the Testcase execution view by clicking on the leftmost icon in the toolbar (1) select the test to execute, and then hit the
playbutton next to the test.
Each option will take us to the Testcase execution view:

In this view you can find the Testcase (1) and the Tests (2) we have created.
If we had created additional tests for this Testcase, they would be listed here as well.
Question marks indicate that the test has not yet been executed.
We can now either execute all tests, or run them individually:
-
Run all Tests(1): Click this button to execute all tests. -
Run Testcase(2): Click this button to a Testcase with all its underlying individual tests.
-
Run individual Test(3): Click this button next to a test to execute this individual test.
Once a test has been executed, the question mark will be replaced by a green check mark or a red cross depending on whether the test was successful or not.
The right hand-panel will show the results of the test execution respectively:

In case of errors, the system will show the error message for further investigation.
Please note, that the creation of the online documentation is Work-In-Progress. It is constantly being updated. should you have questions or suggestions, please don't hesitate to contact us at support@layline.io .